

Winterizing and spring startup are related, but they are not the same job. Winterizing protects water-system components while your RV is stored. Startup is about checking that nothing was damaged during storage and clearing anything stale or left behind from the system before you use it.
That means the first water of the season deserves a little patience. Before you turn on the pump or connect to a campground spigot, inspect the equipment. Then restore the valves to their normal positions, flush the plumbing, decide whether the system needs sanitizing, and check for leaks before leaving it pressurized.
The details vary by RV, filter system, and water heater. Use the diagrams and instructions for your particular coach and appliances whenever their procedures differ from these general steps.
Choose your startup day around freeze risk
There is no universal calendar date for de-winterizing. The right time depends on the likelihood of freezing temperatures where your RV is parked or traveling. If another hard freeze is expected, wait or be prepared to protect the plumbing again.
Also consider where the RV will be that night, not just the forecast where you are doing the work. Water in exposed hoses, filters, and fittings can freeze even if the inside of the RV is warm.
Before water flows: inspect for storage damage
Start with the system dry and unpressurized. A careful visual check can reveal damage before water spreads into a cabinet, storage bay, or wall.
Inspect the whole route from the water connection to the fixtures, including components inside accessible plumbing compartments. Look for:
- Cracked filter housings, heads, or fittings. Check around threaded ports, canister seams, and areas where fittings enter a housing.
- Brittle, split, or cracked hoses. Pay close attention to ends, bends, and spots that may have been pinched during storage.
- A damaged pressure regulator. Look for cracks, loose connections, damaged threads, and missing or flattened washers.
- A cracked pump head or strainer. Inspect the pump body, inlet strainer bowl, and fittings for visible damage.
- Open or displaced valves. A valve that was moved during storage may still be in a winterizing, bypass, or drain configuration.
- Open or loose drain plugs and low-point drains. Check that the fresh tank drain, water-heater drain, and line drain caps or valves are in their expected positions.
- Signs of RV antifreeze residue. Look for pink liquid or residue around fixtures, in filter housings, and near drains.
If you see a crack, stop. Do not test a visibly damaged component by pressurizing it. Replace or have it assessed first. If you cannot identify which valve controls a line, consult the RV or appliance manual before moving it.

Trace the water path and restore valve positions
A frequent startup problem is not a broken part but water traveling through a configuration left over from storage. A winterizing valve can still draw from its suction tube, a bypass can route water around the intended component, or an open drain can prevent the system from holding pressure.
Trace the flow in plain language: Where will water enter, which components will it pass through, and which fixtures or branches will it reach?
- Identify the supply. Are you drawing from the fresh tank with the pump, or from a campground connection? Find the city-water inlet, pump, tank, and any winterizing suction tube.
- Follow the line to the filter. Check whether the filter is on the supply path or bypassed. If there is a bypass valve, verify its normal-use position against the system instructions.
- Find the water-heater valves. A conventional tank heater may have a bypass used during storage. Restore the normal operating position when you are ready to fill the heater. Tankless systems can have different valve instructions; do not assume their setup matches a tank heater.
- Check the drain points. Confirm the fresh-tank drain and low-point drains are closed and capped as directed.
- Follow the branches. Think through how water reaches hot and cold faucets, the shower, toilet, outside shower, and any appliance line, such as an ice maker.
Valve handles can be confusing: parallel and perpendicular positions are not universal, and some systems use multiple valves. Compare the actual hardware with your RV’s diagram rather than relying on the handle angle alone. Manufacturer instructions can differ even between RV models. For example, the Grand Design owner’s manual update describes different arrangements for certain tank and tankless water-heater configurations.
Flush RV antifreeze from every branch
If non-toxic RV antifreeze was used in the plumbing, flush it out before using the water. Pink fluid disappearing from one faucet does not prove every branch is clear.
Keep the water heater’s heating controls off while flushing. If your system has a conventional tank heater, its manual may direct you to leave it bypassed for the initial plumbing flush. Follow the instructions for your heater type, especially for tankless models.
Use potable water from a clean supply. Then work methodically:
- Start with one fixture and run the cold side until the water is clear and no antifreeze odor remains.
- Run the hot side separately. Air may come out first as lines fill; continue until the flow is steady and the water is clear and unscented.
- Repeat at each sink and shower, including the outside shower.
- Flush the toilet according to its operating instructions.
- Flush the ice-maker, refrigerator dispenser, washing-machine connection, or other appliance branches if equipped, following the appliance manufacturer’s instructions.
- Close the fixtures, check the water heater and bypass arrangement, and confirm that the low-point drains and other outlets are closed.
- If your RV manual calls for flushing through low-point drains, open them one at a time into a suitable container, let the water clear, and close them securely afterward.
Taste and odor can linger when antifreeze remains in a long branch, appliance line, filter housing, or other area that did not get enough fresh water flowing through it. Do not rely on a fixed gallon count. The amount depends on your RV’s layout and winterization method.
It is common to need more than one flush-and-drain cycle if pink residue, odor, or an unusual taste remains. Repeat the relevant steps and check all branches again. The observable goal is clear, unscented water with a normal taste, not merely a faucet that has run for a preset time.
If your system was not winterized with antifreeze, you still need to refresh stagnant water and inspect the plumbing. Storage conditions and how long water remained in the system influence what additional cleaning or sanitizing may be appropriate.
Decide whether the system needs sanitizing
Flushing clears residue; it is not the same as sanitizing. A sanitizing pass is worth considering if RV antifreeze was used, the last water source is unknown, water sat in the tank during storage, or musty taste or odor remains after a thorough flush.
Follow your RV, water-system, and sanitizer manufacturer instructions. A general process is:
- Remove or bypass filter cartridges as directed. Some cartridges are not intended to be exposed to concentrated sanitizer.
- Drain the tank and lines as instructed.
- Prepare a chlorine-based solution or approved water-system sanitizer using the specific product label and RV guidance.
- Introduce the solution into the fresh-water tank and circulate it through the system, including the branches and fixtures specified in the instructions.
- Allow the solution to remain in contact for the manufacturer’s stated dwell time.
- Drain and rinse the system thoroughly with potable water before use.
There is no single concentration or dwell time that should be assumed for every RV, sanitizer, tank, or plumbing material. Manufacturer procedures differ. Do not mix cleaners, and do not combine bleach with vinegar or other products. If using bleach, follow established RV sanitation guidance and rinse the system completely before drinking from it. The Grand Design manual includes a coach-specific sanitizing procedure; it is an example of why your own manual should take precedence over a generic recipe.
After sanitizing, flush the system until the sanitizer is cleared in accordance with the product and RV instructions. If a strong odor persists, continue rinsing rather than trying to mask it with a filter. RV Water Filter Store’s water sanitizer and tank-cleaner options are one place to review products, but follow each product’s label for its intended use.
Fill and inspect the water heater before heating
A conventional tank water heater must be full before it is powered or lit. Operating it empty can damage the tank or controls. Keep gas and electric heating off during flushing, draining, and initial filling.
Once the water-heater bypass is in its normal-use position, supply water to the RV. Open a hot-water faucet and let air escape. A steady, air-free stream at the hot faucet is a practical indication that the tank has filled. Check the heater’s fittings and drain plug or anode rod for leaks before enabling heat.
The Suburban water-heater operation and maintenance guide specifically warns that the tank needs to be filled before operation. Your heater may have different startup details, so check the manual for the installed model.
Spring is also a useful time to flush sediment from a conventional tank heater if the manufacturer recommends it. Turn the heater off, let it cool, turn off the water supply, and relieve pressure as directed before opening a drain or service point. Hot water and pressure can cause injury. Use the correct flushing method for the unit, and do not force a plug or anode rod. If you are uncertain, have a qualified RV technician handle the service.
Decide whether to start the season with a fresh cartridge
Before deciding, a word on why storage is hard on a cartridge — the mechanism matters for the decision. A carbon cartridge installed in lines that still held water all winter sat in stagnant water for months. Stagnant water in contact with carbon is exactly the condition where bacterial growth and odor pickup can occur, and a carbon cartridge that has spent a season that way can become a source of the very taste and odor you are trying to eliminate. Cold temperatures suppress that growth during proper winterization, but a cartridge that stayed installed through a storage period that involved any warmth is suspect regardless of how it looks. There is no visible way to distinguish a cartridge that is fine from one that is carrying a season's worth of stagnation.
There is also a freeze dimension. If any water remained trapped in a housing during a cold snap, expanding ice can crack a carbon block internally — damage that may not show on the outside of the cartridge at all. A block with an invisible internal fracture still filters visibly dirty water, but its micron rating and adsorption performance are no longer what the label says.
A filter cartridge that sat installed in damp plumbing all winter deserves a careful decision. A carbon cartridge exposed to stagnant water for an extended storage period is a good candidate for replacement, not rehabilitation. Do not attempt to revive a questionable cartridge by soaking, drying, or flushing it unless its manufacturer explicitly instructs you to do so.
Sediment cartridges are often inexpensive enough to replace routinely, particularly if they were already used through the previous season. Still, your cartridge’s instructions, installation date, use, and water conditions matter.
Starting the season with a fresh cartridge is a defensible choice, not a universal requirement. It gives you a known starting point and avoids uncertainty about storage, freezing, or retained taste and odor. If you replace a cartridge, do so after sanitizing and rinsing, unless the cartridge manufacturer gives different instructions. Flush the new cartridge as directed before normal use.
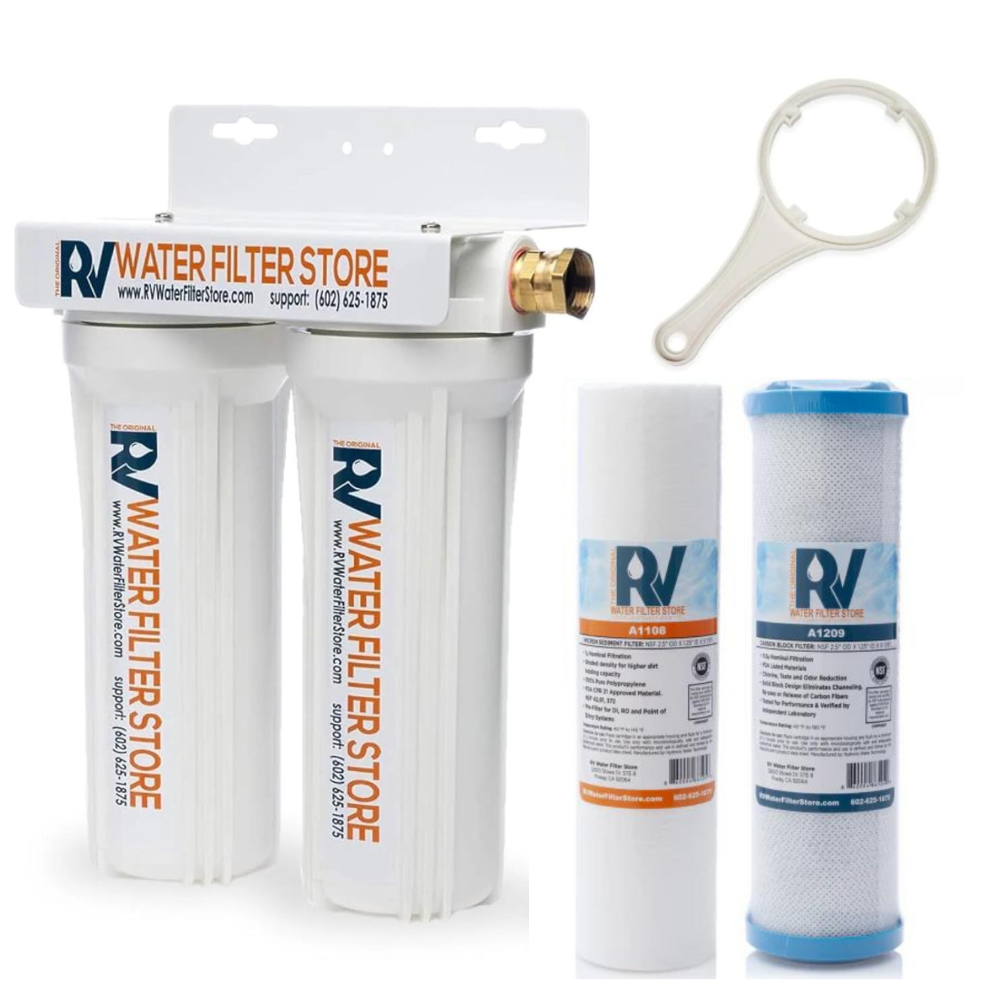
Check the cartridge size and type rather than choosing by appearance. RV Water Filter Store’s replacement filter cartridge collection includes options for different filtration needs. For a complete setup, compare whole-RV water filtration systems based on your water conditions and travel style.
Check the pump and strainer
If you use the onboard pump, it may need to reprime after storage. Follow the pump manufacturer’s instructions, confirm the tank contains water, and avoid running the pump dry for an extended period. If it does not draw water, check the valve positions, tank level, suction connections, and strainer before repeated attempts.
Listen after the lines have filled and the fixtures are closed. A pump may run briefly while building pressure; it should then stop. If it repeatedly cycles with all fixtures closed, the system may have a leak, a pressure-switch problem, or an accumulator issue. Check visible connections and the pump area. If the cycling continues and you cannot find the cause, consult the pump or RV service guidance.
Inspect and clean the pump strainer as directed. A clogged or poorly seated strainer can affect flow or allow leaks at its seal. Make sure it is correctly reassembled before pressurizing the system.
Make the first hookup slowly and check again
When using city water, connect through a suitable pressure regulator and sound hose. Make sure fittings are clean and seated, then bring the water on gradually. Avoid leaving the connection unattended while the system first pressurizes.
Walk through the RV and inspect every accessible connection: the inlet, regulator, hose ends, filter housing, pump and strainer, water-heater fittings, faucets, toilet, shower, and any appliance branch you opened. Look underneath cabinets and around the floor of plumbing compartments. A slow weep can quietly damage cabinets and flooring.
If you find a leak, shut off the supply and relieve pressure before tightening or servicing anything. Do not compensate for a damaged housing or seal by applying excessive force.
Check again after the system has remained pressurized for about an hour. Some slow leaks are not obvious during the first pass. Make sure the pump stays off when no fixture is open, or that city-water connections remain dry.

Take a water baseline, not a safety verdict
Once the system is flushed, sanitized if needed, and operating normally, record a hardness-strip result and a TDS reading. Note where each sample came from (campground spigot, after the filter, or an interior faucet) and whether the RV was supplied by city water or its tank.
A startup test is useful as a baseline for the season. It can help you compare different water sources or track changes over time. A TDS meter is a comparison tool, not a safety test: it does not identify the substances in a sample or establish whether the water is safe. The EPA’s secondary drinking-water standards information explains that secondary standards address qualities such as taste, odor, and appearance rather than serving as health-based limits for every contaminant.
A carbon cartridge can improve taste and odor without lowering TDS. So a similar TDS reading before and after a carbon filter does not, by itself, show that the cartridge has failed. For more on interpreting readings, see what an RV water test actually tells you before you buy a filter.
If the water still smells or tastes wrong after a full flush and appropriate sanitation, investigate the source and the parts of the RV system where water may be sitting. Do not assume a different cartridge alone will solve an unexplained change. If the concern is health-related, follow local public-health advice and use appropriate laboratory testing rather than relying on a TDS meter or taste.
Spring startup checklist
| Stage | Checks and actions |
|---|---|
| Before water flows | Check freeze risk; inspect fittings, filter housing, hoses, regulator, pump head and strainer; close drain points; look for antifreeze residue. |
| Valve positions | Trace the supply from tank or city inlet through the filter and branches; restore winterizing, filter-bypass, and water-heater valves according to the RV manual. |
| Flushing | Run hot and cold sides at every fixture; include outside shower, toilet, appliance lines, and any low-point outlets specified by the RV instructions. Continue until clear and unscented. |
| Sanitizing | Sanitize when indicated by storage or water conditions; use manufacturer-directed solution, concentration, and dwell time; bypass cartridges if required; rinse thoroughly. |
| Water heater | Keep heating controls off while empty; restore normal flow, fill the heater, check for leaks, and flush sediment only as instructed. |
| Filtration | Decide whether to replace stored cartridges; install compatible cartridges after sanitation and rinse; flush new cartridges as directed. |
| Pump | Prime according to its instructions; check the strainer; confirm it stops with fixtures closed and investigate repeated cycling. |
| First hookup | Use a pressure regulator; pressurize slowly; inspect every connection; check again after the system has remained pressurized. |
| Water baseline | Record hardness and TDS with the sample location; treat TDS as a comparison measurement, not a safety verdict. |
Common symptoms and what to check
| Symptom | Possible causes and first checks |
|---|---|
| Sputtering at a faucet | Air remains in the lines, the tank is low, the pump has not primed, or a valve is not in the normal position. Run the fixture and check the supply path; stop if the pump is running dry. |
| Antifreeze or musty odor | A branch, appliance line, filter housing, or tank may not have been flushed fully; the system may need sanitizing under manufacturer guidance. Check more than one fixture. |
| Unusual taste after flushing | Residue may remain in a low-use branch or stored cartridge; a source-water change may also be responsible. Continue the appropriate flush, evaluate the cartridge, and investigate the source if the taste persists. |
| Pump cycles when every fixture is closed | Look for a leak at fittings, filters, or fixtures. If none is visible, a pressure-switch or accumulator issue may need attention. |
| Leak at a filter or fitting | Shut off water and relieve pressure; check the housing for cracks and the O-ring for damage or poor seating. Do not overtighten to compensate for a damaged part. |
Where startup fits in the season
Startup is one checkpoint in a year-long rhythm, not a one-off chore. The same inspection-and-baseline habit that saves you here pays off again at mid-season when cartridge life is actually being consumed, and again in fall when the system is buttoned up for storage. Our season-by-season maintenance checklist lays out the whole year on one page — startup, summer high-use checks, fall transition, and winter storage — so each stage gets the few minutes it needs rather than a full day of catch-up.
Startup also pairs naturally with the winterization article as a matched set: what you drained, bypassed, and protected in the fall is exactly what you restore, verify, and flush in the spring. If you were the one who winterized the rig, you already have the map — the startup job is walking that map in reverse. If you bought the RV recently or the winterization was done by someone else, take the extra time to trace every valve, because the previous configuration is unknown. Our guide to winterizing an RV water filter system explains what was likely done in the fall, which makes the reverse steps easier to verify.
A careful first startup makes the first trip easier
The goal of spring startup is not simply to get water flowing. It is to restore the intended flow path, confirm that storage did not damage anything, flush the lines thoroughly, sanitize when appropriate, and verify the water heater and pump before normal use.
Take the steps in order, and let your RV and equipment manuals settle questions about valve positions, sanitation details, and appliance-specific procedures. If you are unsure about a damaged part, a persistent leak, or a water-quality concern, pause and get qualified help before relying on the system.


