

As temperatures drop, winterizing your RV’s plumbing is about more than draining the fresh-water tank and adding non-toxic RV antifreeze. Your water filtration equipment needs its own shutdown procedure.
A filter canister that looks dry from the outside may still hold enough water inside to freeze. The same is true for a wet carbon cartridge, an inline filter attached to the campground hose, or a filter housing installed inside the RV. If water freezes in the wrong place, it can crack plastic, damage seals, ruin filter media, and leave you with leaks when camping season returns.
The good news is that winterizing an RV water filter system is straightforward when you follow the steps in the right order:
- Shut off the water and relieve pressure.
- Remove cartridges and inline filters.
- Drain the canisters and filter housings completely.
- Reinstall empty housings or bypass the filter.
- Blow out the plumbing or introduce RV antifreeze without sending it through a carbon cartridge.
- Store reusable cartridges indoors and above freezing.
- Inspect everything and install a fresh cartridge in spring.
This seasonal maintenance applies to external whole-RV filtration systems, dual- and triple-canister systems, under-sink housings, and disposable inline filters. Always follow the instructions supplied with your particular RV and filter system, especially if your filter is permanently installed or connected to specialized plumbing.
Why freezing damages RV filter housings
Water expands by approximately 9% when it freezes. That expansion creates pressure inside any closed space where water is trapped, including a filter bowl, cartridge, fitting, or short section of hose.
A filter housing may have enough room for air above the water line, but that does not guarantee it is safe. Water can remain:
- In the bottom of a canister
- Inside the pleats or pores of a cartridge
- Around the center tube of a filter
- In threaded ports and fittings
- Behind an O-ring or gasket
- Inside an inline filter mounted outside the RV
- In a hose connected to the filter inlet or outlet
When that trapped water freezes and expands, it can push outward against the canister walls. Plastic bowls may crack, split, or develop a hairline fracture that does not become obvious until the system is pressurized again. The pressure can also distort the sealing surfaces and damage an aging O-ring. If an O-ring is already brittle, flattened, or nicked, freeze-related movement can cause it to split or lose its seal.
Wet filter cartridges are vulnerable, too. Freezing can damage the cartridge structure, disturb the media, or leave a carbon block less reliable than it was before storage. A cartridge that has been exposed to freezing temperatures should not automatically be treated as ready for drinking water service. Replacing it in spring is generally the simpler and more dependable choice.
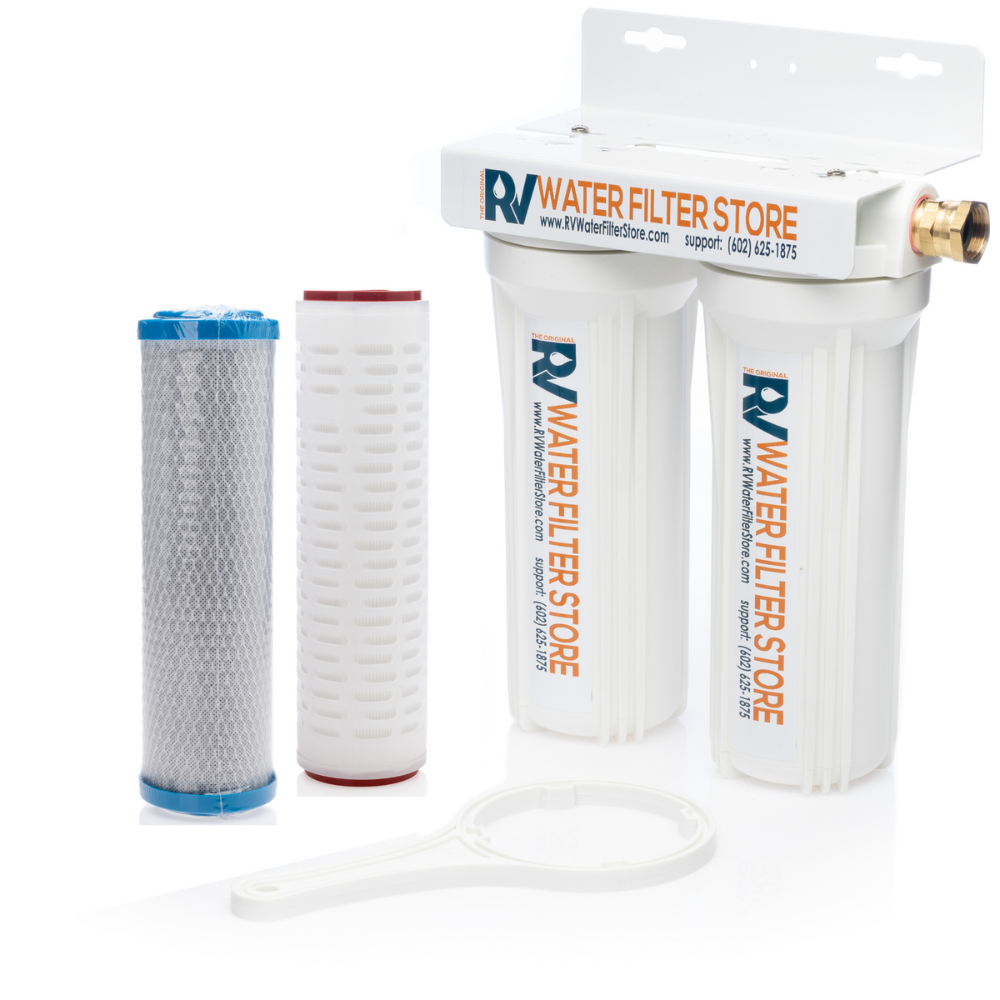
Before you begin: identify every filter in the RV
Many winterization mistakes happen because the owner remembers the main filter but overlooks a second filter somewhere else.
Before draining the plumbing, walk around the RV and identify every water filtration component. Check:
- The exterior whole-RV filter connected between the campground spigot and the RV
- A dual- or triple-canister system
- An inline hose-end filter
- An inline filter installed in a storage compartment
- An under-sink drinking water cartridge
- A refrigerator or ice-maker filter
- A shower filter
- A filter associated with a water softener or specialty treatment system
The RV water filtration systems available for different travel styles may use different cartridge sizes and configurations, so note which cartridge belongs in each housing before removing anything. A quick photo of the installed setup can help you remember the order and direction of the cartridges when spring arrives.
If the system has a sediment cartridge followed by a carbon cartridge, record that sequence. Sediment filtration is commonly placed before carbon filtration so larger particles do not load the carbon stage prematurely. However, your system’s supplied instructions should take priority.
The correct winterization order
1. Shut off the water supply
Disconnect the RV from city water and turn off the water pump. If you have an exterior filter connected to a hose, close the campground spigot before loosening any fittings.
Do not begin unscrewing a pressurized filter canister. A pressurized housing can be difficult to open and may release water unexpectedly when the seal breaks.
2. Relieve pressure
Open a cold-water faucet inside the RV. You can also open the outside shower if it is part of the system you are servicing. Leave the faucet open long enough for pressure to fall.
The goal is to make removing the housing controlled and predictable. If your filter system has a pressure-relief button, use it according to the manufacturer’s instructions.
3. Remove the cartridges before draining the system
Unscrew the canister or filter bowl carefully. A housing wrench may help if the bowl is tight, but avoid excessive force. Once the bowl is loose, remove the cartridge and set it aside for a storage decision.
For a typical dual-canister setup, remove both cartridges. Do not leave one cartridge installed simply because it appears less used. Any cartridge holding water can freeze, and any cartridge exposed to RV antifreeze may retain taste or odor.
Save the O-rings if they are in good condition. Place small parts in a labeled bag so they do not get lost during storage.
4. Empty the canister completely
Pour all remaining water out of the filter bowl. Turn it upside down and allow it to drain. Wipe the inside with a clean, lint-free cloth if water remains around the bottom or threads.
Inspect the canister for:
- Cracks or cloudy stress marks
- Damaged threads
- Chips around the sealing surface
- Dirt or mineral buildup
- A distorted or flattened O-ring
- Moisture trapped in a groove or port
A canister does not need to be polished for winter storage, but it should not be put away with standing water inside it. If you wash the bowl, let it dry fully before storage or reassembly.
5. Reinstall the empty housing or use a bypass
Once the cartridge is removed and the bowl is drained, you have two common options.
Option one: Reinstall the empty housing.
Place the O-ring correctly in its groove and screw the empty bowl back onto the head. Tighten it by hand only unless your manufacturer specifies another method. The empty housing keeps the plumbing connected while allowing winterizing fluid or air to pass through the line.
Option two: Bypass the filter.
If your setup has a bypass valve or bypass tube, use it. Bypassing is often preferable when you plan to pump RV antifreeze through the plumbing because the antifreeze will not enter the filter housing.
Do not leave the cartridge in place while relying on a bypass unless the bypass truly isolates the filter. Check the flow path so you know where the winterizing fluid will travel.

Blowing out the RV water lines
Some RV owners winterize by using regulated compressed air instead of pumping RV antifreeze through the plumbing. If this is your method, the filter still needs to be removed first.
The general sequence is:
- Disconnect the water supply.
- Remove all cartridges and inline filters.
- Drain the canisters.
- Reinstall empty housings or use the filter bypass.
- Connect the proper blow-out adapter.
- Use the pressure and procedure recommended by your RV manufacturer.
- Open fixtures one at a time until water is no longer expelled.
- Include hot and cold lines, the toilet, outside shower, ice-maker line, and other water outlets.
- Drain low-point lines according to the RV’s instructions.
Compressed air can remove much of the water from the plumbing, but it does not make a cartridge safe to leave outside. A wet filter that is still attached to the hose or sitting in an exterior compartment can freeze independently of the RV plumbing.
Use only a regulated air supply and the correct adapter. Excessive air pressure can damage RV plumbing components, valves, or fixtures. If you are uncertain about your RV’s recommended pressure or winterization sequence, consult the owner’s manual or a qualified RV technician.
Using RV antifreeze without damaging the filter
RV winterization antifreeze is used to protect plumbing components from freezing. It is not a substitute for draining the filter cartridge, and it should not be sent through a carbon cartridge.
Carbon media can absorb and retain substances that pass through it. If RV antifreeze saturates a carbon block or granular carbon cartridge, the cartridge may continue releasing an unpleasant taste or odor after the plumbing is flushed. A saturated cartridge can also take substantially longer to rinse clear.
The safer procedure is:
- Remove the cartridges.
- Drain and reinstall empty canisters, or bypass the filter.
- Set up the RV’s winterization valve or pump converter according to the RV manual.
- Pump RV antifreeze through the plumbing.
- Open each fixture until the appropriate winterization fluid reaches it.
- Include the toilet, outdoor shower, and other connected outlets.
- Keep the filter cartridge out of the antifreeze flow path.
Never put automotive engine antifreeze into an RV drinking-water system. Use only a product intended and labeled for RV potable-water plumbing, and follow its label directions and your RV manufacturer’s instructions.
If your filter system is installed inside the RV and cannot be easily removed, use the supplied bypass arrangement or have the system configured so antifreeze does not pass through the cartridge. Do not assume that closing one valve protects the filter; trace the flow path or consult the installation documentation.
How to store filter cartridges over winter
Once the cartridge is removed, decide whether it is worth storing or replacing it.
For many RV owners, winterization is the natural time to discard a used cartridge and install a fresh one in spring. Filter media is consumable, and a cartridge that has already spent a season handling campground water may not be worth carrying through months of storage.
If you plan to reuse a lightly used cartridge, storage instructions can vary by cartridge design and manufacturer. Some filters may be stored damp, while others should be drained and dried. The important rule is to follow the instructions for that specific cartridge rather than assuming every filter should be treated identically.
Moist storage
Some filter manufacturers recommend keeping certain cartridges moist to prevent the media from drying out. If your cartridge instructions allow or require moist storage:
- Rinse it only as directed.
- Drain excess water.
- Place it in a clean, sealed bag or container.
- Label the bag with the cartridge type and removal date.
- Store it indoors, away from freezing temperatures.
- Follow the manufacturer’s temperature and storage-time guidance.
A refrigerator may be appropriate for some cartridge designs, but it is not a universal requirement. Do not place a filter in a refrigerator with food unless it is sealed properly and the manufacturer permits that storage method.
Dry storage
Other cartridges may be stored after draining and air-drying. If dry storage is recommended:
- Shake or drain out as much water as possible.
- Allow the cartridge to dry in a clean, protected area.
- Keep it away from dust, fumes, chemicals, and direct sunlight.
- Seal it in a clean bag or container after it has dried as directed.
- Store it above freezing.
Do not use a household hair dryer, heater, or high-temperature source to accelerate drying. Heat can damage plastic components, adhesives, or filter media.
The simplest spring-ready option
If you are not certain whether a used cartridge should be kept wet or dry, replacing it in spring is usually the least complicated approach. This is especially true for a carbon cartridge that has been used heavily, exposed to questionable water, left sitting in a warm environment, or accidentally frozen.
You can compare sediment, carbon, specialty, and complete replacement options in the replacement filter cartridges collection. Choose a replacement based on your existing housing size, filtration needs, and the water conditions you expect to encounter: not simply on the cartridge’s appearance.
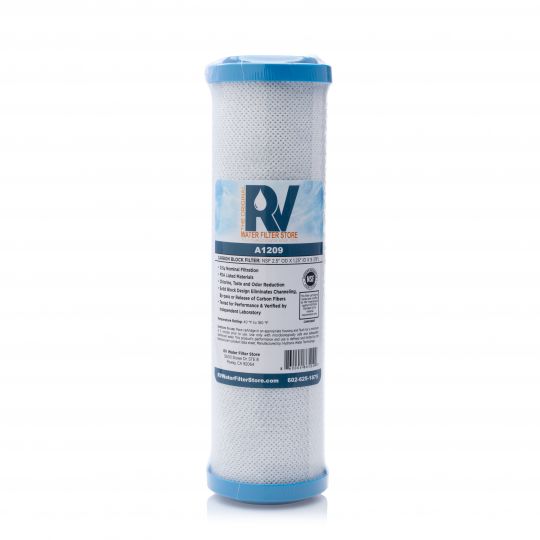
Do not forget an exterior inline filter
Disposable inline filters are easy to overlook because they may be attached to the hose outside the RV rather than mounted on the RV itself. When you disconnect the city-water hose, check for a filter between the spigot and hose, at the hose end, or near the RV’s city-water inlet.
For most disposable inline filters, remove the entire filter before winter storage. Depending on its usage and the manufacturer’s instructions, you may choose to replace it rather than store it.
An inline filter left outdoors can freeze even if the RV interior stays warm. A filter left attached to a hose may also trap water in the fittings and create a frozen plug. Drain the hose separately and store both items where temperatures will remain above freezing.
For a replacement or supplemental hose-end filter, see the in-line filters collection. The same winter rule applies: remove it from the water path, drain it, and protect it from freezing.
Winterizing a water softener
A portable RV water softener should also be disconnected and protected from freezing. The resin tank and connected fittings can retain water after the hose is removed.
Follow the softener manufacturer’s instructions for draining, regeneration, storage position, and temperature limits. Do not assume that because a softener contains resin rather than a conventional filter cartridge it can safely freeze. Water trapped in the tank, valve, or fittings can still expand.
If the softener is connected in series with the filtration system, remove or bypass both components before introducing RV antifreeze. Keep the softener, filter housings, hoses, and pressure-regulation equipment together so the full water-treatment setup can be inspected in spring.
Common winterization mistakes
Leaving a wet cartridge in the housing
This is the most common filter-related mistake. The cartridge may look secure, but it can hold a considerable amount of water. Freezing can damage the media and place pressure on the bowl.
Better approach: remove the cartridge, drain the bowl, and store the cartridge indoors according to its instructions: or replace it in spring.
Running antifreeze through a carbon cartridge
Antifreeze that passes through carbon media can leave a lingering taste or odor. It may also be difficult to flush completely.
Better approach: remove the cartridge and bypass the filter before pumping antifreeze through the RV plumbing.
Forgetting the exterior filter
An exterior whole-RV canister or inline hose filter may be outside the heated portion of the RV. Draining the fresh tank does not drain this equipment.
Better approach: treat the exterior filter as a separate winterization task.
Assuming an empty-looking bowl is dry
A thin layer of water in the bottom, threads, or port can freeze and expand.
Better approach: invert the housing, drain it fully, wipe it out, and inspect the sealing areas.
Over-tightening the canister during reassembly
Over-tightening can stress the housing and make spring removal difficult. It can also distort the O-ring.
Better approach: seat the O-ring correctly and hand-tighten the bowl unless the manufacturer specifies a torque or wrench procedure.
Reusing a questionable cartridge
A cartridge that froze, developed an odor, sat wet for months, or was used beyond its service interval may not be a good candidate for reuse.
Better approach: install a fresh cartridge after the plumbing has been flushed and sanitized.
Winterizing without labeling the cartridges
When several filters look similar, it is easy to forget which cartridge belonged in which housing.
Better approach: label the cartridge type, housing position, and removal date: or use a fresh matched set in spring.
Spring recommissioning checklist
When freezing weather has passed, do not immediately install the cartridge and start drinking from the system. Bring the RV water system back online in a deliberate sequence.

1. Inspect the filter equipment
Before connecting water, inspect the canisters, filter head, ports, fittings, and mounting bracket. Look for cracks, distortion, discoloration, or other signs of freeze damage.
Check each O-ring. Replace one that is:
- Flattened
- Brittle
- Cracked
- Stretched
- Cut
- Missing
- No longer seated correctly
Clean the groove and sealing surface. If your manufacturer recommends it, use a small amount of suitable plumbing-safe lubricant on the O-ring. Avoid petroleum products unless specifically approved for the material.
2. Flush winterizing fluid from the RV plumbing
If RV antifreeze was used, flush it according to the RV manufacturer’s instructions. Run clean potable water through the fixtures until the water is clear and the antifreeze taste or odor is gone.
Remember the outlets that are easy to miss:
- Kitchen faucet
- Bathroom faucet
- Shower
- Outside shower
- Toilet
- Ice maker
- Washing-machine connection
- Low-point drains
If the filter was bypassed during winterization, leave it bypassed while flushing the plumbing.
3. Sanitize the fresh-water system
Winterization protects plumbing from freezing, but it is not a substitute for cleaning and sanitizing. Before the first trip, sanitize the fresh-water system using the RV manufacturer’s procedure or an appropriate RV water-system sanitizer.
Use the correct concentration and contact time for the product. Afterward, flush the system thoroughly with potable water.
Do not install a new carbon cartridge before sanitation is complete. Sanitizer or concentrated cleaning solution should not be sent through a new drinking-water cartridge unless the cartridge instructions specifically allow it.
4. Install a fresh cartridge
After flushing and sanitizing, install the new cartridge. Confirm that:
- The cartridge is the correct size.
- The cartridge is facing the correct direction, if directional.
- The O-ring is properly seated.
- The bowl threads engage smoothly.
- The canister is hand-tightened as directed.
- The filter is no longer bypassed.
A fresh cartridge each spring creates a consistent starting point for the season. It also avoids wondering whether a stored cartridge absorbed antifreeze taste, was damaged by freezing, or sat too long between uses.
5. Flush the new cartridge
New carbon cartridges may release harmless carbon fines during initial use. Run water through the cartridge according to its instructions until the water is clear and the initial taste is gone.
Do not judge a new cartridge by the first few seconds of flow. Proper flushing prepares the cartridge for normal use.
6. Pressurize slowly and check for leaks
Connect to city water through an appropriate pressure regulator, or turn on the RV water pump. Pressurize the system gradually and inspect the filter housing.
Look at:
- The top of each bowl
- The O-ring seal
- The inlet and outlet fittings
- The pressure-relief area
- The canister threads
- The hose connections
- The underside of the housing
- Any quick-connect fittings
A small drip should be addressed immediately. Shut off the water, relieve pressure, reseat or replace the O-ring, and inspect the housing again. Do not try to solve a damaged housing with excessive tightening.
Plan the annual cartridge replacement
For many RV owners, a fresh cartridge every spring is an easy annual maintenance habit. Actual cartridge life depends on the product, water quality, usage, flow rate, and storage conditions, so follow the cartridge manufacturer’s replacement guidance.
A calendar reminder can help you replace the cartridge before the first major trip. If you travel year-round, base replacement on usage and the manufacturer’s service recommendations rather than the calendar alone.
The RV Water Filter Store’s Subscribe & Save option can help keep replacement cartridges on hand for the start of the camping season. Ordering ahead also gives you time to confirm the cartridge size, inspect the housings, and complete the spring flush before departure.
Final winterization sequence
For a quick reminder, use this order:
- Disconnect city water and turn off the pump.
- Open a cold faucet to relieve pressure.
- Locate every cartridge, canister, inline filter, and water-treatment component.
- Remove cartridges before winterizing.
- Drain and wipe filter housings completely.
- Inspect and save usable O-rings.
- Reinstall empty canisters or engage the filter bypass.
- Remove and drain any exterior inline filter.
- Blow out lines or pump RV antifreeze according to the RV manual.
- Keep RV antifreeze out of carbon cartridges.
- Store reusable cartridges sealed and above freezing, following their instructions.
- Protect softeners, hoses, fittings, and accessories from freezing.
- Label anything you plan to reinstall in spring.
The most important principle is simple: never leave water-filled filter equipment exposed to freezing temperatures. Remove the cartridges, empty the canisters, bypass the filter for RV antifreeze, and start spring with an inspected housing and a fresh cartridge. A few extra minutes during fall shutdown can prevent cracked bowls, damaged seals, unpleasant antifreeze taste, and an unexpected repair when your next RV trip begins.


