

An RV water filter system does important work every time you connect to a campground spigot, fill your fresh water tank, or turn on the onboard pump. It helps reduce sediment, chlorine, unpleasant tastes, odors, and other unwanted substances before water reaches your RV plumbing and faucets. Like any part of your coach, however, filtration equipment performs best when it is inspected and maintained on a schedule.
A seasonal maintenance calendar keeps small tasks from becoming inconvenient problems. It reminds you to replace cartridges before they become exhausted, check housings and connections before a leak reaches the storage compartment, and prepare filters and softeners for freezing weather. It also gives you a practical way to adjust care based on how often you travel.
A weekend camper may use the same filter for several trips over a season, while a full-time RVer may run hundreds of gallons through the system in the same period. Neither traveler should rely on the calendar alone. Water quality, usage, sediment load, storage conditions, and noticeable changes in flow or taste all matter.
This checklist provides a starting point for maintaining a whole-RV filtration system, inline filter, replacement cartridge, or portable water softener throughout the year. Always follow the instructions for your specific system and cartridge, especially for sanitizing, cartridge service life, softener regeneration, and winterization.
Why your RV water filter needs a maintenance calendar
Water filtration maintenance is easy to postpone because the system is usually out of sight. A filter housing may be mounted in a basement compartment, an inline cartridge may remain attached to a hose, or a softener may sit outside near the campground connection. If water still comes out of the faucet, it can seem as though everything is working normally.
There are several reasons to schedule inspections instead of waiting for a problem:
- Cartridges gradually collect sediment. A filter can look fine on the outside while its internal media becomes loaded.
- Flow changes may be subtle. A gradual pressure reduction at the shower or kitchen faucet is easy to overlook until the cartridge is heavily restricted.
- Connections experience repeated handling. Hoses, quick connects, adapters, and regulator fittings are connected and disconnected at nearly every campsite.
- Rubber seals age. O-rings and washers can flatten, crack, or lose flexibility after repeated use, cleaning, and storage.
- Stagnant water requires attention. Filters, housings, hoses, and tanks should not be left wet and forgotten for long periods.
- Water sources vary. A clear municipal supply and a visibly cloudy campground spigot can place very different demands on the same cartridge.
- Freezing temperatures can damage components. Water trapped inside a filter housing, hose, regulator, or softener can expand and cause damage.
A maintenance calendar does not mean every RV owner must replace every cartridge on the same date. Instead, it gives you regular checkpoints. At each checkpoint, combine the calendar with actual observations: water flow, appearance, taste, odor, pressure, travel frequency, and the condition of the equipment.
RV water filter maintenance schedule at a glance
The table below separates seasonal tasks by both time of year and travel style. “Weekend warrior” refers to an RVer who takes occasional trips and may store the coach between outings. “Full-timer” refers to an RVer who uses the water system regularly and moves between water sources throughout the year.
| Season or timing | Weekend warrior | Full-timer | Main focus |
|---|---|---|---|
| Spring recommissioning | Inspect before the first trip; sanitize after winter storage; install a fresh cartridge; flush thoroughly | Perform a full inspection after any storage period; replace cartridges based on installation date, usage, and condition | Restart the system cleanly and check for leaks |
| Every arrival or departure | Inspect hoses, fittings, regulator, filter body, and visible seals | Inspect connections at each campground change and before extended use | Catch leaks, cracked fittings, and damaged hoses early |
| Summer active use | Check sediment load at least monthly during the travel season; check flow and taste before longer trips | Check sediment load monthly or more often at poor-quality water sources; monitor pressure and flow routinely | Manage high usage and changing water conditions |
| Mid-season | Replace or service cartridges if loaded, restricted, or due under the manufacturer’s instructions | Replace cartridges according to actual throughput, water quality, and manufacturer guidance; do not wait for severe pressure loss | Restore flow and filtration performance |
| Fall transition | Inspect all parts before storage; replace worn O-rings, washers, hoses, or cartridges as appropriate | Review the condition of all water equipment before moving to a different travel pattern or colder region | Prevent small defects from becoming storage or winter problems |
| Winter storage | Drain housings, remove cartridges, dry components, and protect them indoors from freezing | Follow the same steps during any extended freeze or storage period; do not leave wet filtration equipment exposed | Prevent freeze damage and stagnant-water issues |
| Annual planning | Order replacement cartridges before spring travel begins | Keep replacement cartridges on hand and adjust ordering to actual usage | Avoid starting a trip with an exhausted or missing cartridge |
The calendar is most effective when you record three details: the date a cartridge was installed, the type of water encountered, and any noticeable change in pressure or taste. A note in your phone, maintenance app, or RV service log is enough.
Spring: recommission your RV water filtration system
Spring is the most important maintenance season for many RV owners. If your coach has been stored, the water system may have been drained, winterized, or left unused for weeks or months. Before connecting your filtration equipment for the first trip, inspect the entire path from the campground spigot to the RV plumbing.
1. Inspect filter housings and O-rings
For a canister-based system, remove the housing according to the manufacturer’s instructions and inspect:
- The housing for cracks, clouding, distortion, or damaged threads
- The cap and port connections for damage
- The O-ring for cracks, flattening, brittleness, or debris
- The O-ring groove for grit or dried residue
- The mounting bracket and screws for looseness
- The inlet and outlet fittings for stress or cross-threading
Clean the sealing surfaces with clean water and a soft cloth. Do not force a housing closed if the O-ring is out of position. A pinched or twisted O-ring can leak as soon as the system is pressurized.
If the seal is worn, replace it with the correct part for the housing. Avoid substituting an O-ring of uncertain size or material. A small seal is inexpensive compared with repairing water damage inside an RV.
Inline filters also deserve an inspection. Check the molded body, hose fittings, directional arrow, and any built-in washers. If an inline filter was left attached during storage, replace it rather than assuming it is ready for another season.
2. Sanitize the fresh water tank and lines
Sanitizing the fresh water system is separate from replacing an external filter cartridge. Remove filter cartridges before sanitizing so cleaning solution does not pass through and damage or exhaust the media.
Follow your RV manufacturer’s procedure or the instructions for your approved water-system sanitizer. In general, the process includes:
- Drain old water from the fresh tank and plumbing.
- Remove or bypass filtration cartridges.
- Prepare the sanitizer exactly as directed on the product label or in the RV manual.
- Introduce the solution into the fresh water tank.
- Fill the tank as instructed.
- Run the solution through the cold and hot water lines, shower, and other outlets.
- Allow the recommended contact time.
- Drain the system.
- Refill and flush with fresh water until the sanitizer is cleared according to the instructions.
Do not assume that an external filter replaces tank sanitation. A filter installed at the campground connection cannot clean every surface inside the RV’s tank and plumbing. Likewise, sanitizing the tank does not remove the need for a fresh filtration cartridge.
3. Install a fresh cartridge after sanitizing
Once the tank and lines have been flushed, install the correct cartridge for your system. Check the cartridge dimensions, flow direction, micron rating, and intended application before installation.
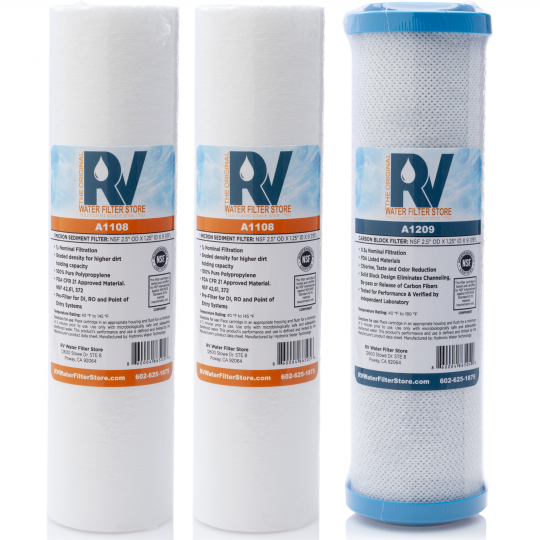
A sediment cartridge may be appropriate as the first stage in a multi-stage system, while a carbon block cartridge may be used for taste and odor improvement or as a later stage. Specialty cartridges may address specific water concerns. Do not choose a replacement based only on appearance; confirm that it is designed for your housing and filtration goals.
You can compare replacement options in the RV water filter replacement cartridge collection. The collection includes carbon, sediment, specialty, jumbo, and other replacement options.
4. Flush the new cartridge
New cartridges may contain air or manufacturing residue that should be flushed before normal use. Open a faucet or use the system’s recommended flush procedure. Run water until the flow is steady and the water is clear, following the cartridge manufacturer’s instructions.
Carbon cartridges can release fine initial particles, sometimes called carbon dust. That does not necessarily mean the cartridge is defective. Proper flushing helps clear the initial discharge before you use the water for drinking or cooking.
After flushing, pressurize the system slowly and inspect every connection. Look around the housing seam, O-ring, hose fittings, quick connects, regulator, and RV inlet. A dry paper towel can help reveal a small leak that is difficult to see.
Summer: monitor filtration during high-use travel
Summer often brings the greatest combination of water demand, campground changes, heat, and travel frequency. A cartridge that performs well at one campground may load quickly at another. For that reason, summer maintenance should be based on both time and system behavior.
Check sediment load monthly
At least once a month during active travel, inspect the first-stage sediment cartridge or the visible condition of an inline filter. Look for:
- Brown, gray, orange, or otherwise unusual discoloration
- A visibly loaded outer surface
- Sediment collecting in a clear housing
- A change in flow at the shower or faucets
- Cloudiness or particles in water after flushing
- A cartridge that has been exposed to an unusually poor water source
Appearance is not the only measure of cartridge condition. Some media become exhausted without a dramatic color change. Record installation dates and follow the rated service guidance for your specific cartridge.
If you frequently fill from private wells, older campground infrastructure, or sources with noticeable sediment, inspect more often. If your RV remains connected to water for extended periods, your usage may justify a shorter replacement interval than an occasional traveler’s.
Check for pressure drop
A drop in pressure can come from several sources, including a loaded cartridge, clogged screen, restricted hose, regulator setting, campground supply, or RV plumbing issue. Begin with a simple comparison rather than immediately replacing every component.
If your setup allows it, compare flow with the filter connected and with the filter bypassed or removed according to safe operating instructions. If flow improves substantially when filtration is bypassed, the cartridge may be restricted. If flow remains poor, investigate the regulator, hose, spigot, inlet screen, and RV plumbing.
A pressure gauge can help you observe changes, but do not use pressure readings outside the limits of your RV, filter system, regulator, or hose. The goal is not to maximize pressure. The goal is to provide appropriate flow while protecting the RV plumbing.
A new cartridge should not be used to solve every pressure problem. Replacing a filter when the actual issue is a kinked hose or clogged screen may hide the cause temporarily and waste a cartridge.
Inspect hoses, quick connects, and fittings
Hot sun, repeated coiling, and pressure changes can affect water hoses and connection points. At each campground change, look for:
- Bulges, cuts, abrasions, or soft spots in hoses
- Bent or damaged hose ends
- Missing or flattened washers
- Cracks around quick-connect bodies
- Leaks at the spigot, regulator, filter inlet, or RV inlet
- Fittings that have been forced or cross-threaded
- Dirt inside open hose ends
Keep connection ends capped or protected when disconnected. A clean connection is easier to inspect and less likely to transfer grit into an O-ring or filter port.
A pressure regulator is commonly installed between the campground spigot and the RV water system. Check that it is in good condition and compatible with your setup. If the regulator has a gauge, do not assume the gauge alone proves that the entire system is functioning correctly. Observe water flow at the RV fixtures as well.
For replacement or system options, review the whole-RV water filtration systems and compare the available configuration based on your water conditions, travel frequency, available space, and desired stages. A larger or more complex system is not automatically the right choice for every RV.
Track portable water softener regeneration
A water softener addresses hardness, which is different from sediment or chlorine filtration. Hard water can contribute to scale and spotting and may affect faucets, shower surfaces, and plumbing components. A softener does not replace a filter, and a filter does not regenerate softening resin.
During summer, record when the softener is regenerated and where it was used. The interval depends on the softener’s capacity, the hardness of the source water, and the volume used. Regenerate according to the softener manufacturer’s instructions rather than following a universal calendar.
A hardness test can help you understand whether the source water or softened water is changing. RV Water Filter Store offers water testing products, including hardness test strips, chlorine-dioxide testing products, and a total dissolved solids meter. Use the test appropriate to the question you are trying to answer; a TDS reading, for example, is not the same as a hardness measurement.
When storing or transporting a portable softener between stops, keep the connections protected and follow the manufacturer’s instructions for keeping the resin wet or preparing the unit for storage. Never allow a softener to freeze.
Fall: prepare filtration equipment for changing travel patterns
Fall maintenance is not only about winterization. It is also a useful transition point for checking whether your equipment is ready for another season of travel, a long storage period, or a move to warmer climates.
Perform a pre-winter inspection
Before temperatures approach freezing, inspect:
- Filter housings and caps
- O-rings and washers
- Replacement cartridges
- Hoses and hose ends
- Pressure regulator
- Quick connects and adapters
- Mounting brackets
- Portable water softener connections
- Any exterior filter or plumbing exposed to weather
Replace worn parts before storage rather than placing them in a bin to be forgotten. A cracked washer or hardened O-ring can turn the first spring connection into a leak.
If a cartridge has reached the end of its service life, replace it before storage only if that matches the manufacturer’s recommendations and your storage plan. In many cases, it is more practical to remove the used cartridge and install a new one during spring recommissioning. The important point is not to leave an exhausted, wet cartridge attached and assume it will be ready next season.
Decide what to do with cartridges
Cartridge storage depends on the cartridge type and manufacturer’s instructions. As a general maintenance practice, do not leave a wet, used cartridge inside a disconnected housing throughout an extended storage period unless the product instructions specifically allow it.
If the cartridge is reusable or intended for storage, follow the specified cleaning, draining, and storage procedure. If the cartridge is disposable and has been used through the season, discard it and plan to start with a fresh cartridge in spring.
Label any cartridge you intend to keep with its installation date and the water conditions in which it was used. However, remember that a label does not restore an exhausted cartridge. When in doubt, replacing a questionable cartridge is the safer maintenance decision.
Review your replacement inventory
Fall is a good time to check whether you have the correct replacements for the next season. Confirm:
- Cartridge size and type
- Number of stages in your system
- Sediment and carbon requirements
- Housing wrench or service tools
- O-rings and washers
- Spare hose washers
- Sanitizer or tank-cleaning supplies
- Softener regeneration supplies
- Water-testing supplies
The in-line filter collection is useful for RV owners who prefer compact filtration or need a replacement for a hose-connected inline setup. Confirm the product’s connections and intended use before ordering.
Winter: drain, remove, and protect filtration components
Winter storage is where many preventable filter problems begin. Any component that can retain water should be evaluated before freezing temperatures arrive.
Drain filter housings
For a canister system:
- Turn off the water supply and relieve pressure.
- Open a faucet briefly if appropriate for your system.
- Remove the housing according to the manufacturer’s instructions.
- Remove the cartridge.
- Drain water from the housing and ports.
- Inspect the O-ring and sealing surfaces.
- Dry the housing and store it as directed.
Do not overtighten the housing during reassembly. Excessive force can make spring recommissioning difficult and may damage threads or seals. If the manufacturer recommends a particular lubricant for the O-ring, use only that product and amount.
Remove and protect cartridges
Remove cartridges before freezing weather unless the cartridge manufacturer specifically provides another procedure. Water trapped inside a cartridge or housing can expand when frozen. Store removable components in a clean, dry, temperature-controlled location, following the product instructions.
Do not store cartridges next to chemicals, fuel, strong odors, or dirty tools. Keep caps and openings protected from dust and insects. If a cartridge becomes cracked, contaminated, or questionable during storage, replace it before using the system.
Protect exterior accessories
Drain and protect exterior hoses, pressure regulators, quick connects, and portable softeners. Coil hoses loosely enough to avoid sharp bends. Keep connection ends covered. Store components where they will not be exposed to freezing temperatures, direct sunlight, road salt, or standing water.
Follow your RV manufacturer’s winterization procedure for the fresh tank, water heater, pumps, low-point drains, and plumbing. Filtration equipment should be treated as one part of the complete water system, not as a substitute for winterizing the RV itself.
Adjusting the schedule for your travel style
Weekend warriors
Occasional travelers often benefit from a “before every trip” inspection because equipment may sit unused between outings. Before connecting:
- Check the cartridge installation date.
- Inspect the housing, hose, regulator, and fittings.
- Look for cracks, dried seals, or insect debris.
- Flush the system as directed.
- Check for leaks after pressurizing.
- Verify that water flow is normal.
If the RV sits for an extended period, do not assume that a cartridge is still usable simply because it has seen few travel days. Storage conditions and the manufacturer’s instructions matter. A cartridge that remained wet, warm, or connected may need different handling than a cartridge removed and stored properly.
Full-timers
Full-time RVers should think in terms of usage and water conditions rather than spring, summer, fall, and winter alone. Set recurring reminders for:
- Monthly sediment and housing inspections
- Pressure and flow checks
- Cartridge replacement reviews
- Hose and connection inspections at each campground change
- Softener regeneration tracking
- Water testing when moving to a significantly different source
- Inventory checks for replacement cartridges and seals
Full-timers may also benefit from keeping a spare cartridge and common sealing parts onboard. The correct spare depends on your system, so record the exact cartridge model and housing size rather than relying on memory.
How Subscribe & Save can support your annual replacement cycle
Replacement planning is easier when you connect it to the way you actually travel. If your system uses cartridges that you replace on a recurring schedule, the Subscribe & Save program can help keep replacements arriving before the next service interval.
A practical approach is to:
- Install a fresh cartridge at spring recommissioning.
- Record the installation date.
- Estimate your active travel period and usage pattern.
- Review the cartridge manufacturer’s replacement guidance.
- Choose a delivery interval that matches your needs.
- Adjust, skip, or cancel shipments if your travel schedule changes.
- Keep one replacement available for unexpectedly poor water conditions or a clogged cartridge.
Subscribe & Save should support your maintenance routine, not replace it. A scheduled shipment does not determine when a cartridge is exhausted. If a cartridge loads quickly because of sediment, replace it sooner. If the RV is stored for part of the year, adjust the delivery schedule so cartridges are not sitting unused or arriving when you do not need them.
You can review the Subscribe & Save replacement filter options when building your annual maintenance plan.
Quick checklist for every water connection
Use this short routine whenever you arrive at a new campground:
- Inspect the spigot and surrounding area.
- Check the hose for damage and confirm the ends are clean.
- Verify the pressure regulator is installed in the correct position.
- Confirm the filter’s flow direction.
- Inspect fittings, washers, and quick connects.
- Connect the system without forcing threads.
- Turn on water slowly.
- Check the housing seam and every connection for leaks.
- Flush the filter according to its instructions.
- Observe flow at the RV faucet or shower.
- Record unusual odor, taste, color, or pressure changes.
A few minutes at each connection can prevent a wet compartment, a damaged fitting, or an unexpectedly restricted shower.
Final seasonal maintenance checklist
Your RV water filter maintenance calendar can be summarized this way:
- Spring: inspect housings and O-rings, sanitize the fresh water system, install a fresh cartridge, flush the system, and check for leaks.
- Summer: inspect sediment load monthly, monitor pressure and flow, examine hoses and connections, and track portable softener regeneration.
- Fall: perform a pre-winter inspection, replace worn seals and damaged accessories, review cartridge condition, and restock supplies.
- Winter: drain housings, remove cartridges, protect hoses and exterior components, and follow the RV manufacturer’s complete winterization procedure.
- Every trip or campground change: inspect connections, pressurize slowly, check for leaks, and confirm normal flow.
- Every year: review your cartridge replacement pattern and adjust Subscribe & Save deliveries to match your actual travel schedule.
The right maintenance interval depends on your filtration system, water sources, usage, and storage conditions. A calendar gives you consistency, while regular observation tells you when conditions require earlier service. Together, they help your RV water filter system remain ready for the next campsite, the next season, and the next adventure.