

A water filter should improve the quality of your RV’s water without making every faucet feel like it is running through a straw. When the shower turns weak, a second faucet causes the first one to sputter, or filling the fresh-water tank takes far longer than usual, a restriction somewhere in the water path may be reducing flow.
The filter system may be responsible: but it may not be the filter cartridge.
A clogged sediment cartridge, exhausted carbon block, undersized housing, trapped air, kinked hose, restrictive pressure regulator, or dirty inlet screen can all produce similar symptoms. The quickest way to find the culprit is to test the system in stages instead of replacing parts at random.
This troubleshooting process will help you:
- Recognize symptoms that point to a filter-related restriction
- Separate a filter problem from a campground supply problem
- Test the spigot, hose, regulator, and filter one component at a time
- Measure pressure drop across a filter with two gauges
- Decide whether to flush, reinstall, or replace a cartridge
- Choose cartridge types and micron ratings with flow in mind
- Correct common installation problems quickly
Pressure and flow are related, but they are not the same
RVers often use “low pressure” and “low flow” to describe the same problem. They are connected, but the distinction matters during diagnosis.
Water pressure is the force available in the line. It is commonly measured in pounds per square inch, or PSI.
Water flow is the amount of water moving through the line over time. It is commonly expressed in gallons per minute, or GPM.
A campground spigot may show acceptable pressure when no fixture is open but deliver very little flow when the shower is running. Likewise, a filter may show normal pressure when the system is static but create a substantial pressure drop while water is moving through it.
That is why a pressure reading taken with every faucet closed is not enough to identify a clogged cartridge. For filter troubleshooting, compare conditions under flow whenever possible.
Symptoms that may point to a restricted RV water filter
A filter-related restriction usually affects more than one fixture because the filter is installed upstream of much of the RV’s plumbing. Look for a pattern rather than one isolated symptom.
Weak shower flow
A shower that used to provide a steady stream but now produces a thin spray may be experiencing a restriction before the RV plumbing. If the showerhead screen is clean and the bathroom faucet is also weak, check the city-water line, regulator, hose, and filter.
Sputtering when a second fixture opens
If the kitchen faucet runs acceptably by itself but sputters or nearly stops when someone opens the shower, the system may not have enough available flow to serve both fixtures. A partially clogged cartridge or undersized inline filter can become the bottleneck.
Faucets that take a long time to deliver water
When every faucet produces only a small stream, the issue is probably not an individual aerator. A restricted filter, kinked hose, dirty inlet screen, or low campground supply may be limiting the entire coach.
Slow fresh-water tank filling
If you are filling the tank through a hose-connected fill port or another filtered path, a clogged filter can make the process unusually slow. Compare the fill rate with the filter bypassed, while following your RV manufacturer’s instructions for filling.
Flow that starts strong and then fades
This pattern can indicate debris moving into a cartridge, a regulator that cannot maintain flow, or a source that loses pressure as demand increases. It can also occur when an air pocket is being displaced after a filter change.
Sputtering, surging, or air in the lines
Air trapped inside a canister or hose can cause inconsistent flow. If the problem began immediately after installing a new cartridge, trapped air should be checked before assuming the new cartridge is defective.
Start with a baseline test at the campground spigot
Before opening a filter housing, establish whether the water source can provide adequate flow.
Turn off the RV and disconnect all equipment from the campground spigot. If local rules or your equipment require a backflow device, keep the appropriate safety device in place. Otherwise, test the spigot with a short, unrestricted hose or by briefly opening the spigot into a suitable container.
Observe two things:
- The initial force of the stream
- Whether the stream remains strong as water continues to run
A spigot can have acceptable static pressure but poor available flow. If the stream is weak before you connect the RV hose, the filter is not the first suspect. Try another spigot or site if practical, and ask the campground whether the water system is experiencing a known pressure issue.
Do not assume that removing a pressure regulator is always safe. Campground water pressure can vary significantly. If you temporarily test without a regulator, know your RV’s safe inlet-pressure limit and keep the test brief. An adjustable regulator with a gauge can make this comparison safer and easier.
Isolate the restriction one component at a time
The most reliable field test is to add each component back into the system separately. Begin with the supply, then add the hose, regulator, and filter. Run the same fixture under similar conditions after every change.
A typical test sequence is:
- Campground spigot alone
- Spigot plus water hose
- Spigot, hose, and pressure regulator
- Spigot, hose, regulator, and RV filter
- The complete connection to the RV
Record what happens at each step. You do not need laboratory equipment. A simple note such as “strong,” “acceptable,” or “weak,” along with the time needed to fill a container, can reveal the bottleneck.
Step 1: Test the spigot
If the spigot is weak by itself, investigate the campground supply first. A filter cannot restore flow that is not available upstream.
Step 2: Add the hose
A hose can restrict flow if it is kinked, sharply bent, crushed beneath a tire, or internally collapsed. Inspect both ends, including the short sections near the fittings where bends are common.
Some hoses have smaller internal passages than others. A long, narrow hose may allow water to pass but still cause a noticeable loss when multiple fixtures are open.
Step 3: Add the pressure regulator
If flow drops sharply when the regulator is installed, the regulator may be clogged, damaged, undersized, or set too low. A regulator protects the RV from excessive inlet pressure, so it should not simply be removed permanently to improve flow.
Check the regulator’s screen if it has one. If the regulator is adjustable, confirm that its setting is appropriate for your RV and the manufacturer’s pressure limit. A gauge can help you see whether the regulator is maintaining pressure while water is flowing.
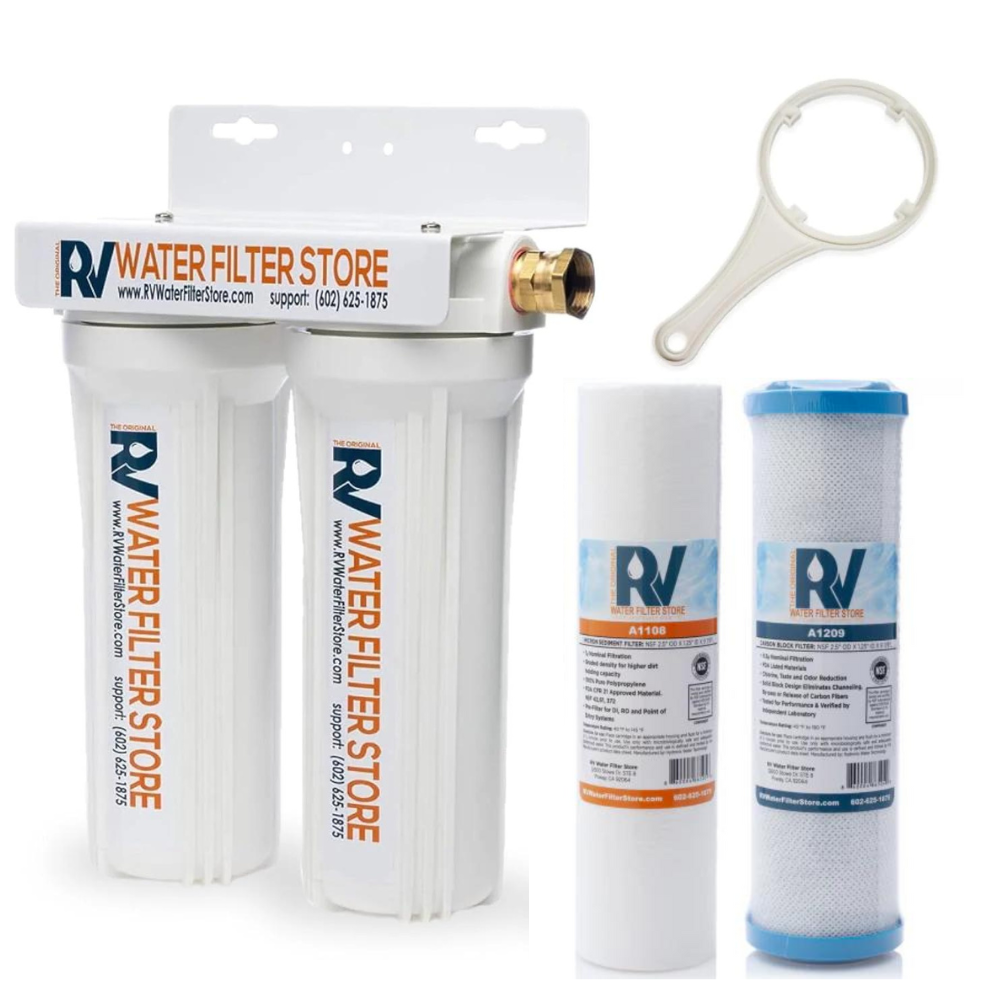
Step 4: Add the filter system
If the supply, hose, and regulator perform well until the filter is connected, concentrate on the filter system:
- Cartridge condition
- Cartridge micron rating
- Filter orientation
- Housing size
- Inlet and outlet fittings
- Shutoff valves
- Trapped air
- Debris in the inlet screen
This staged method also works with an inline filter. Test the inline filter separately rather than assuming that a small component cannot restrict flow.
Common causes of pressure drop and weak flow
1. Clogged sediment cartridge
Sediment is one of the most common causes of filter-related flow loss. Sand, rust, clay, silt, and other particles collect on the cartridge surface. As the filter loads with debris, water has fewer open pathways available.
A sediment cartridge may look gray, brown, orange, or visibly dirty. However, appearance is not the only indicator. A cartridge can restrict flow before it looks dramatically discolored.
Quick fix: Replace the cartridge if it is disposable. If the housing contains multiple stages, inspect the first sediment stage before replacing the carbon stage. The sediment cartridge often catches the material that would otherwise load the finer media downstream.
You can compare available sediment and other cartridge options in the Replacement Filter Cartridges collection.
2. Exhausted or restrictive carbon block
Carbon blocks improve taste and odor by forcing water through a dense carbon medium. They can also create more resistance than a coarse sediment cartridge, especially as the block becomes loaded with sediment or reaches the end of its service life.
An exhausted carbon block may cause:
- Lower flow
- Returning chlorine taste or odor
- Water that takes longer to reach the faucet
- A gradual decline rather than a sudden failure
Carbon blocks are not normally restored by rinsing. Running clean water through the outside of a cartridge will not remove contaminants trapped throughout the carbon block.
Quick fix: Replace the carbon cartridge according to its service guidance, usage, water conditions, or noticeable change in taste and flow. Protecting it with a sediment stage can help preserve both cartridge life and flow.
3. Undersized housing
A small housing or compact inline filter may be convenient, but it has less media area and smaller internal passages than a larger whole-RV housing. That can become noticeable when the shower and a faucet operate at the same time.
An undersized setup is not necessarily defective. It may simply be mismatched to the RV’s demand, hose length, or incoming water conditions.
Quick fix: Use a filter system with adequate capacity for the number of fixtures and expected flow. A larger whole-RV system can be a better fit when multiple fixtures need water simultaneously. A smaller, finer drinking-water filter can then be reserved for a single point of use instead of restricting the entire coach.
Review the available RV Water Filtration Systems and compare the configuration with your travel style and water conditions.
4. Air trapped in the housing
Air can enter when you change a cartridge, disconnect a hose, or open the canister. The result may be sputtering, pulsing, or a stream that improves and worsens unpredictably.
Quick fix:
- Turn on the supply slowly.
- If the housing has a bleed button, use it briefly according to the system instructions.
- Open a cold-water faucet.
- Let the water run until the stream becomes steady.
- Repeat at another faucet if the RV still sputters.
- Check all connections for leaks that could allow air to enter.
Do not open a pressurized canister. Shut off the water and release pressure before servicing the housing.
5. Wrong micron rating
The micron rating describes the approximate size of particles a cartridge is designed to reduce. In general, a lower micron rating means finer filtration. Finer media may also create more resistance and load more quickly when the source contains substantial sediment.
A very fine cartridge may be appropriate for a specific water-quality goal, but it may be a poor choice as the only whole-RV stage when campground pressure is already marginal.
Quick fix: Match the cartridge to the job. A coarser sediment stage can protect downstream carbon media, while finer filtration can be reserved for the application that requires it. Always confirm compatibility and performance information for the specific system and cartridge.
6. Kinked or collapsed hose
A filter may appear to be causing the problem when the actual restriction is in the hose immediately before or after it. Look for sharp bends, flattened sections, twisted fittings, and hose ends that are under strain.
Quick fix: Straighten the hose, remove weight from it, and reroute it with wider bends. Replace a hose that remains soft, flattened, cracked, or internally collapsed. A properly sized custom-built hose can help when your connection layout repeatedly creates sharp bends.
7. Dirty inlet screen or fitting
Small screens in regulators, hose fittings, quick connects, or the RV city-water inlet can catch debris. A partially blocked screen can mimic a clogged cartridge.
Quick fix: Shut off the water, depressurize the line, remove the screen if the component allows it, and rinse away debris. Inspect the fitting for damaged mesh or fragments. Replace a screen that cannot be cleaned.
8. Partially closed valve or incorrect flow direction
A filter housing, bypass loop, or hose connection may include a valve that is not fully open. Some filters also have a required flow direction.
Quick fix: Verify that every supply valve is fully open and that water enters the filter at the marked inlet. Follow the installation instructions for your specific system rather than relying only on the appearance of the fittings.
How to measure pressure drop across a filter with two gauges
A two-gauge test is the clearest way to determine whether the filter itself is restricting flow.
Install one pressure gauge upstream, before the filter, and one downstream, after the filter. The gauges should be installed so they measure the line pressure at comparable points. Temporary hose adapters may be used if they are rated for the pressure and connection type.

Test procedure
- Turn off the water supply.
- Install the upstream and downstream gauges securely.
- Check for leaks.
- Open one faucet or fixture enough to create a steady flow.
- Record the upstream pressure.
- Record the downstream pressure at the same time.
- Repeat with a second fixture open if you are diagnosing a multi-fixture problem.
- Subtract downstream pressure from upstream pressure.
Pressure drop = upstream pressure − downstream pressure
For example, if the upstream gauge reads 52 PSI while water is flowing and the downstream gauge reads 38 PSI, the measured pressure drop is 14 PSI.
The exact amount of acceptable pressure drop depends on the system, cartridge, flow rate, water conditions, and manufacturer specifications. There is no single PSI number that identifies every clogged RV filter. The useful comparison is:
- A new, correctly sized cartridge under a known flow condition
- The same cartridge later in its service life
- The same system with a different cartridge or filter stage bypassed
A pressure drop that becomes much larger over time is strong evidence that the cartridge is loading. A large drop immediately after installation suggests a mismatched cartridge, undersized housing, blocked fitting, incorrect orientation, or an installation problem.
If both gauges show low pressure but the difference between them is small, the filter may not be the restriction. Look upstream at the campground supply, regulator, hose, or inlet screen.
When to replace a cartridge versus flush the system
“Flush the filter” can mean two different things: flushing the housing and plumbing, or attempting to clean the cartridge. Those are not the same.
Flush the housing and lines when:
- You have installed a new cartridge
- The system contains trapped air
- Carbon fines appear after a new carbon cartridge is installed
- The system has been stored
- You have disconnected and reconnected the hoses
- You are rinsing loose debris from fittings
Follow the cartridge instructions for initial flushing. Carbon media may release harmless dark fines at first, so continue flushing until the water runs clear and the manufacturer’s instructions are satisfied.
Replace the cartridge when:
- Flow remains weak after air is purged
- The cartridge is visibly loaded with sediment
- The cartridge has reached its recommended service interval
- Taste or odor reduction has declined
- The cartridge is damaged, swollen, cracked, or deformed
- The measured pressure drop is substantially higher than normal
- The cartridge has been exposed to questionable water and is not intended for reuse
Most carbon block cartridges are disposable and should not be scrubbed, backwashed, or regenerated. Some pleated sediment cartridges may be washable, but only if the manufacturer specifically identifies them as washable. Do not assume that rinsing a cartridge makes it sanitary or restores its original performance.
How cartridge choice affects pressure
The filter media and available surface area both influence flow.

Coarse sediment media
Coarser sediment media generally provides more open flow paths and can be a practical first stage when incoming water contains visible particles. Its main job is to catch larger debris before that debris reaches a finer cartridge.
Fine sediment media
Fine sediment media can capture smaller particles, but it may create more resistance and clog sooner in dirty water. Using a fine cartridge as the only stage can result in frequent flow loss if the source has a heavy sediment load.
Carbon block media
Carbon block media is dense by design. It can improve taste and odor, but it may have a greater initial pressure drop than a coarse sediment cartridge. Once the carbon block becomes loaded, flow can decrease further.
Larger cartridge surface area
A larger cartridge or housing gives water more media area to pass through. This can reduce the pressure drop at a given flow rate compared with a smaller cartridge doing the same job.
The right configuration depends on your water conditions and travel habits. A weekend traveler using relatively clear municipal water may have different needs from a full-time RVer moving between older campground systems, private wells, and visibly sediment-heavy supplies.
Diagnostic decision table
| What you observe | Most likely area to check | Confirmation test | Quick fix |
|---|---|---|---|
| Weak flow directly at the campground spigot | Campground supply | Test spigot without hose or filter equipment | Try another spigot or site; ask about supply pressure |
| Flow is strong at the spigot but weak after the hose | Hose or hose fitting | Add the hose by itself and compare flow | Remove kinks; clean or replace the hose and fittings |
| Flow drops when the regulator is added | Pressure regulator or regulator screen | Test with a known-good regulator, using safe pressure practices | Clean the screen or replace the regulator; verify setting |
| Flow drops only after the filter is connected | Filter system | Bypass the filter and compare under the same demand | Inspect cartridge, housing, valves, fittings, and orientation |
| Flow was good after installation but declined gradually | Loaded cartridge | Measure pressure before and after filter while flowing | Replace the clogged or exhausted cartridge |
| Flow became weak immediately after changing cartridges | Air, wrong cartridge, blocked fitting, or installation issue | Purge air; verify cartridge and flow direction | Bleed housing, flush lines, inspect fittings, reinstall correctly |
| Water sputters from several fixtures | Trapped air or unstable supply | Open faucets and purge air; test source independently | Bleed housing and lines; investigate supply if sputtering continues |
| One faucet is weak but others are normal | Aerator, shower screen, or local valve | Remove and clean the fixture screen | Rinse screen, inspect fixture valve, reinstall |
| Pressure drop is high across the filter | Clogged, fine, restrictive, or undersized filter | Compare upstream and downstream gauges during flow | Replace cartridge or use a better-matched system |
| Both gauges read low with little difference between them | Upstream source, regulator, or hose | Compare readings with filter bypassed | Troubleshoot supply-side restriction |
| Flow is acceptable with one fixture but poor with two | Capacity or flow-rate limitation | Run two fixtures and compare pressure drop | Use adequate housing and cartridge capacity; reduce simultaneous demand |
| Filter cartridge looks clean but flow is poor | Fitting, valve, housing, or wrong rating | Run briefly with cartridge removed only if safe and appropriate | Inspect passages, valves, seals, orientation, and cartridge specifications |
Quick fixes before your next campsite
If you need a practical order of operations, use this short checklist:
- Confirm whether the campground spigot has adequate flow.
- Check the hose for kinks, flattening, and damaged ends.
- Inspect and test the pressure regulator safely.
- Clean accessible inlet screens and fitting screens.
- Verify all valves are fully open.
- Confirm the filter’s inlet and outlet direction.
- Depressurize the system before opening the housing.
- Purge trapped air after servicing.
- Inspect the sediment cartridge first.
- Replace a loaded or exhausted cartridge.
- Confirm that the micron rating and housing size match the application.
- Use two gauges if the restriction is still unclear.
For compact setups or occasional use, an in-line filter may be convenient, but its capacity and internal passage size should match your expected demand. For multiple fixtures, longer stays, or changing water conditions, compare a whole-RV system with enough cartridge area to maintain usable flow.
A portable water softener can also add another component to the line. If you use one, test it separately during the same one-component-at-a-time process. A softener that is loaded with sediment or connected through a restricted fitting may contribute to the total pressure drop, even though its primary job is to reduce hard-water effects rather than filter sediment or chlorine.
The best way to prevent recurring pressure loss
The most effective prevention is to change cartridges before severe restriction develops. Keep track of:
- The date each cartridge was installed
- Campground or well-water conditions
- Visible sediment in the cartridge
- Changes in taste or odor
- Flow with one fixture open
- Flow with two fixtures open
- Any pressure readings from your gauges
If you travel frequently, carrying a spare sediment cartridge can prevent a dirty-water stop from becoming a no-water evening. Replacing the first-stage cartridge when it is loaded can also protect finer carbon media and help preserve system flow.
Do not choose the finest available cartridge automatically. Filtration performance, cartridge life, housing capacity, available source pressure, and the number of fixtures you use all matter. A filtration system should be selected around your actual water conditions and travel style: not just the smallest micron rating on the label.
When you isolate each component in order, most RV water filter pressure-drop problems become manageable. Test the source first, add the hose and regulator one at a time, then evaluate the filter under real flow. That approach tells you whether you need a new cartridge, a different cartridge, a larger housing, a cleaner screen, a better hose, or simply a few minutes of air purging.

