

A portable RV water softener can protect your plumbing, water heater, fixtures, and appliances from the calcium and magnesium that cause hard-water scale. But the softener resin has a limited capacity. Once the resin has collected as much hardness as it can hold, the unit must be regenerated with salt brine before it can soften water effectively again.
Regeneration is a routine part of owning an 8,000- or 16,000-grain portable RV water softener. With the right salt, a controlled brine cycle, and a thorough rinse, the process is straightforward and can usually be completed at a campground utility area, dump station, or another approved drain location.
This article explains what regeneration does, how much salt to use, how to run the brine through the resin, how to test the result, and how to store the softener between trips.
Important: Portable softeners vary in tank design and regeneration instructions. Always follow the instructions supplied with your specific unit if they differ from the general process below.
What regeneration actually does
Portable RV water softeners use ion-exchange resin. The resin is initially loaded with sodium ions. As campground water passes through the tank, calcium and magnesium ions, the minerals responsible for water hardness, attach to the resin.
At the same time, sodium ions are released into the water.
In simplified form:
- Hard-water calcium and magnesium enter the resin bed.
- Sodium ions leave the resin bed.
- The treated water contains fewer hardness minerals.
- Over time, the resin becomes saturated with calcium and magnesium.
- A concentrated salt solution restores the resin to its sodium form.
During regeneration, the salt dissolves in fresh water and creates a brine. Because the brine contains a high concentration of sodium ions, it reverses the exchange process. Sodium displaces the accumulated calcium and magnesium on the resin. The hardness minerals and salty rinse water then leave through the drain.
Regeneration does not replace a carbon filter. A softener is designed primarily to reduce hardness minerals and prevent scale. It does not perform the same job as a sediment, carbon, specialty, or virus-rated filter.
For contaminant reduction and better taste, see the RV Water Filtration Systems.
Signs that your RV water softener needs regeneration
Grain capacity is a useful estimate, but actual softener life depends on your source-water hardness, water usage, flow rate, and the amount of iron or sediment in the water. The best approach is to watch for performance changes and confirm them with a hardness test.
Regenerate the unit when you notice one or more of these signs:
Soft water no longer feels slippery
Softened water often feels slick or slippery on your skin because soap rinses differently when calcium and magnesium are removed. If the water suddenly feels more like the untreated campground water, the resin may be approaching exhaustion.
This sensation is helpful as a quick warning, but it should not be your only test. Water feel is subjective and can change with soap, temperature, and skin condition.
Soap stops lathering normally
Hardness minerals react with soap and make it more difficult to produce a rich lather. You may notice that shampoo, hand soap, or dish soap requires more product than usual.
If soap performance changes while the rest of your RV plumbing is operating normally, test the water at the softener outlet.
Scale returns on fixtures
White spots or chalky deposits on faucets, showerheads, and sink fixtures indicate that hardness minerals may be passing through the softener again. A small amount of spotting can also come from water that dried on the fixture, so use a hardness test to confirm the cause.
Your hardness test reads higher
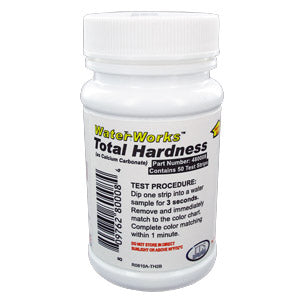
A hardness test is the most reliable routine check for a portable softener. Test untreated campground water and then test water from the softener outlet. If the outlet reading begins to climb toward the source-water reading, the resin needs to be regenerated.
A hardness test can also help you estimate how quickly your unit is being exhausted at different campgrounds. RV Water Filter Store offers Water Tests, including water-hardness test strips.
Choosing between an 8,000- and 16,000-grain softener
An 8,000-grain softener and a 16,000-grain softener regenerate using the same basic principle. The difference is the amount of hardness the resin can remove before it becomes exhausted.
A rough calculation is:
Gallons of usable capacity = grain capacity ÷ water hardness in grains per gallon
For example, an 8,000-grain unit operating on water measured at 10 grains per gallon has a theoretical capacity of about 800 gallons:
8,000 ÷ 10 = 800 gallons
A 16,000-grain unit under the same conditions would have a theoretical capacity of about 1,600 gallons.
Actual usable capacity can be lower because of flow rate, iron, sediment, incomplete regeneration, and household water usage. Use these numbers as planning estimates rather than a guarantee.
An 8,000-grain unit may suit you if you:
- Travel alone or with a partner
- Take weekend trips or shorter seasonal trips
- Use moderate amounts of water
- Want the smallest and easiest unit to carry
- Do not mind regenerating more often in very hard water
A 16,000-grain unit may suit you if you:
- Travel with a family
- Stay in one location for extended periods
- RV full-time
- Camp in areas with very hard water
- Want more capacity between regeneration cycles
RV Water Filter Store lists portable softener options through its RV Water Softeners collection. Choose capacity based on your water hardness, number of travelers, available storage, and how frequently you want to regenerate, not simply on the largest available number.
How much salt does each unit need?
For the portable RV softeners covered here, common regeneration amounts are:
| Softener capacity | Typical salt amount |
|---|---|
| 8,000 grain | About 2 pounds, commonly one standard box of plain table salt |
| 16,000 grain | About 4 pounds, commonly two standard boxes of plain table salt |
Some salt is sold in boxes with different net weights, so measure by weight when possible. If your owner’s instructions specify a different amount, use those instructions rather than relying on the table.
Using too little salt may leave the resin only partly regenerated. Using substantially more salt does not necessarily make the resin work better and can create a more concentrated waste stream that takes longer to rinse.
Which type of salt should you use?
Plain sodium chloride is the usual choice
Most portable RV water softeners are designed to be regenerated with ordinary sodium chloride. Plain table salt dissolves readily and is easy to find while traveling. Non-iodized salt is often preferred, although many manufacturer instructions allow regular table salt.
The key is to select salt with no fragrance, dyes, cleaning agents, or other additives.
Crystal salt
Plain salt crystals can work well if they dissolve readily and fit into the tank opening. They may take longer to dissolve than fine table salt, particularly in cool water.
Pellet salt
Water-softener pellets are usable only when they are plain sodium chloride and the unit’s opening can accept them. Large pellets may dissolve slowly in a small portable tank. Break up oversized pieces rather than forcing them into the opening.
Block salt
Salt blocks are generally inconvenient for portable RV softeners. They can be difficult to fit into the tank, dissolve slowly, and make it harder to measure the correct quantity. Plain table salt is usually simpler for a portable unit.
Pool salt
Do not assume pool salt is suitable. Some pool products contain additives or are formulated for a different application. If a pool salt product does not clearly identify itself as additive-free sodium chloride, choose plain table salt instead.
Potassium chloride
Potassium chloride can regenerate standard cation-exchange resin in some systems, but it is more expensive and is not the default recommendation for every portable RV softener. Use it only if the softener manufacturer approves it and provides an appropriate dosage.
Potassium chloride brine still contains a high concentration of dissolved salts. It should not automatically be poured onto grass, landscaping, soil, or into surface water simply because it is not sodium chloride.
Supplies for regeneration
Gather these items before starting:
- The correct amount of plain salt
- A clean bucket if you are mixing brine separately
- Fresh water
- A hose long enough to reach an approved drain
- A towel or small container for drips
- Water-hardness test strips
- Gloves if your hands are sensitive to saltwater
- A pressure regulator for normal hookup and rinse operation
- The softener’s instructions
Regenerate where you can control the discharge. A campground spigot surrounded by grass is usually not an appropriate place to release concentrated brine.
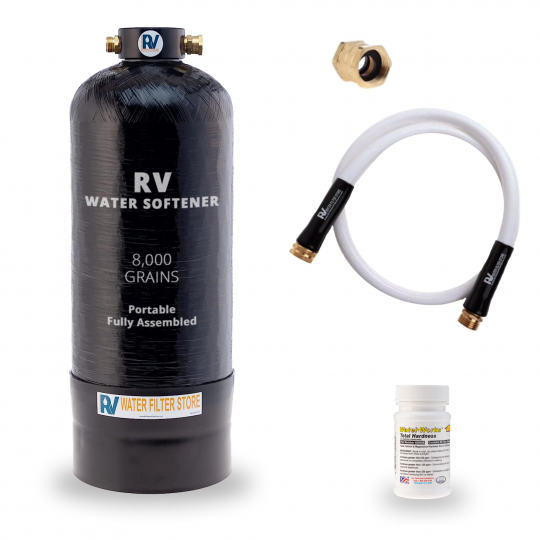
Step-by-step: regenerating a portable RV water softener
1. Turn off the water and relieve pressure
Shut off the campground spigot or the pump supplying the softener. Open a nearby RV faucet briefly to release pressure from the hose.
Do not disconnect a pressurized hose. A small amount of trapped pressure can cause a surprising spray and may damage fittings if the hose is pulled or twisted.
If your setup includes a bypass, put the softener in bypass before disconnecting it.
2. Disconnect the softener from the RV
Remove the hose from the softener outlet and then from the inlet. Keep the inlet and outlet caps available if your unit uses them.
Inspect the fittings and washers. A worn hose washer can look like a softener problem when the actual issue is a small leak at the connection.
3. Drain the tank
Drain as much water as possible from the tank. Depending on the unit’s design, this may involve tipping it over carefully or opening the tank as directed by the manufacturer.
Drain the water into an approved receptacle or drain location. Avoid dumping water directly onto vegetation or the ground.
Once drained, return the tank to its normal upright position. The resin should settle back into the bottom of the tank.
4. Open the tank carefully
Remove the cap or head according to the manufacturer’s instructions. Do not use pliers unless the instructions specifically call for them.
Check the sealing washer or O-ring. Wipe away grit and make sure it is seated correctly before reassembly. A pinched or dirty O-ring can cause a leak during regeneration.
5. Add the measured salt
Add approximately:
- 2 pounds for an 8,000-grain unit
- 4 pounds for a 16,000-grain unit
Some users prefer to dissolve the salt in a clean bucket of fresh water first. Others add the dry salt to the tank and then add water. Either method can work if it matches the unit instructions.
Do not fill the tank completely to the top. Leave the space needed for the cap, brine movement, and safe handling.
6. Add fresh water to create the brine
Add fresh water according to the tank’s instructions. If no fill mark is provided, do not guess by packing the tank full. The goal is to create a strong salt solution that can contact the entire resin bed without overflowing when the cap is replaced.
Stirring or gently rocking the tank can help dissolve the salt, but do not shake it aggressively. The resin should remain in the tank and the fittings should not be stressed.
7. Allow contact time
If your unit uses a static regeneration method, let the saltwater sit in contact with the resin for the specified time. A typical soak may be approximately 30–60 minutes, but some portable units use a shorter cycle.
If your unit uses a flow-through method, reconnect the cap and route the outlet hose to an approved drain. Introduce water slowly so the brine moves through the resin bed at a controlled rate.
A fast blast of water can push brine through unevenly and may reduce the quality of the regeneration. Slow flow gives the salt solution more opportunity to contact the resin.
8. Run the brine through the resin
For a flow-through cycle:
- Connect the water supply to the softener inlet.
- Route the softener outlet to the approved drain.
- Open the water supply slowly.
- Keep the flow controlled for the time specified by the softener instructions.
- Watch for leaks around the cap and hose fittings.
- Do not allow the discharge to pool around plants, tires, electrical equipment, or campsite surfaces.
Many portable units are designed for a regeneration cycle of less than 30 minutes when plain table salt is used, but the exact time depends on the unit and flow rate.
9. Rinse with fresh water
After the brine cycle, continue running fresh water through the softener. Begin with a slower rinse to remove the concentrated salt solution from the resin bed.
Then, if the manufacturer permits it, increase the flow briefly to flush out remaining salt and any loose resin fines.
Do not reconnect the softener to the RV yet. The initial rinse water may contain a high level of salt and may have a salty taste.
10. Test the outlet water
Collect a sample from the softener outlet after rinsing. Follow the instructions on your hardness test strips carefully, including the required sample volume and waiting time.
The outlet should show a substantially lower hardness reading than the untreated source water. If the result is still high:
- Continue rinsing and test again.
- Confirm that the correct amount of salt was used.
- Check that the brine actually contacted the resin.
- Make sure the tank was not bypassed during the regeneration cycle.
- Inspect the internal tube or fittings if the problem continues.
- Contact the manufacturer if the unit still does not soften water after a correctly performed regeneration.
Do not rely on taste alone. Water should not taste salty when the rinse is complete, but a normal taste does not prove that the water is soft.
11. Reconnect and check for leaks
Once the outlet water is rinsed and tested, connect the softener between the campground supply and the RV.
Use a pressure regulator to protect the RV plumbing and softener connections from excessive pressure. Open the supply slowly, inspect every connection, and let a faucet run briefly to clear air from the line.
Keep the softener upright during normal operation so the resin bed remains evenly distributed.

How often should you regenerate?
There is no single schedule that works for every RVer. Water hardness and daily usage can vary dramatically from one campground to the next.
Weekend travelers
An 8,000-grain unit may last several weekend trips when two people use moderate amounts of water and the source water is not extremely hard. In very hard water, or when the RV is used by a larger group, regeneration may be needed after one long weekend.
A practical routine is to:
- Test water before a longer trip.
- Regenerate before departure if the unit has been sitting saturated.
- Test the outlet when you arrive at a new campground.
- Regenerate when hardness rises or soft-water performance changes.
A 16,000-grain unit may provide more capacity between trips, but it still needs to be tested rather than left unattended indefinitely.
Full-time RVers
Full-time users may need to regenerate an 8,000-grain unit every one to three weeks, depending on hardness and water consumption. A 16,000-grain unit may extend that interval to several weeks.
Showers, laundry, frequent dishwashing, and filling the RV tank all consume capacity. If you use only a small amount of water, the same softener may last much longer.
Track three things for several locations:
- Source-water hardness
- Approximate gallons used
- Days between regeneration cycles
That record will help you establish a realistic routine without regenerating too early or allowing hard water to pass through for days.
How to keep the resin bed working
Regeneration restores the resin, but good operating habits help it last longer.
Protect the softener from sediment
Sediment can coat the resin and interfere with water flow. If the campground supply is visibly cloudy or contains particles, use a sediment pre-filter before the softener.
Avoid unnecessary exposure to strong oxidizers
High levels of chlorine and other oxidizing chemicals can shorten the life of ion-exchange resin. Do not pour bleach, tank sanitizer, or other cleaning chemicals into the softener unless the manufacturer specifically approves the procedure.
Clean and sanitize the RV plumbing separately, then flush it thoroughly before reconnecting the softener.
Keep the unit upright
The resin bed should remain settled and evenly distributed. Store and operate the tank upright whenever possible.
Do not let the resin dry out
Resin performs best when it remains hydrated. Do not leave the tank open in the sun or intentionally bake the resin dry.
For long-term storage, follow your model’s instructions carefully. If the unit must be drained for freezing conditions, remove free water thoroughly and store it in a protected, above-freezing location. The objective is to prevent freeze damage without leaving the resin exposed to prolonged drying.
Avoid freezing
Water expands when it freezes. A tank that appears mostly empty can still contain enough trapped moisture to damage fittings, the internal tube, or the tank itself.
Never store a portable softener outside through freezing weather. Drain it as directed, protect the ports, and move it into a climate-controlled storage area.
Combining a water softener with a carbon filter
A softener and a carbon filter solve different water problems.
| Equipment | Primary purpose |
|---|---|
| Portable water softener | Reduces calcium and magnesium hardness to help prevent scale |
| Sediment filter | Captures sand, rust, and suspended particles |
| Carbon filter | Reduces chlorine, tastes, and odors; performance depends on the cartridge |
| Specialty filter | Targets specific contaminants according to the cartridge design |
A common external hookup order is:
Campground spigot → pressure regulator → sediment protection → portable water softener → carbon filtration system → RV inlet
This arrangement places sediment protection before the softener and allows the carbon stage to improve taste after hardness has been reduced.
However, follow the flow direction and installation instructions for your specific filtration system. Some systems may be designed to reduce chlorine before water reaches other treatment equipment. If your source water contains significant sediment, iron, or unusual contaminants, test the water and choose the treatment order accordingly.

Brine disposal at a campground or dump station
Regeneration creates salty wastewater. Sodium or potassium brine should not be released onto:
- Grass or campground landscaping
- Garden beds
- Soil near trees
- Storm drains
- Creeks, lakes, or rivers
- The campsite pad where it can damage vegetation or corrode equipment
Before regenerating, ask the campground host or operator where softener brine may be discharged. Some campgrounds permit it at a designated dump station or sanitary drain. Others have specific restrictions because their wastewater system may use a septic tank or may not be designed for concentrated brine.
If the campground allows disposal at a dump station, route the regeneration hose directly into the designated opening and keep the area clean. Do not assume that every dump station permits brine simply because it accepts RV wastewater.
When connected to a municipal sewer system, a utility sink or floor drain may be appropriate if local rules and the property owner allow it. Do not pour brine into a septic system without confirming that it is acceptable for that system.
When in doubt, pause regeneration until you have a permitted sanitary discharge location.
Winter care and storing a regenerated softener
At the end of the camping season, many RVers regenerate the softener so it is not left loaded with hardness minerals. After regeneration:
- Rinse the unit thoroughly.
- Disconnect all hoses.
- Drain the tank according to the manufacturer’s instructions.
- Remove standing water from the ports and fittings.
- Inspect the O-rings and caps.
- Store the unit upright in a protected location.
- Prevent freezing.
- Keep the resin from prolonged exposure to air and heat.
- Regenerate or rinse again before returning to service if the unit has been stored for an extended period.
There are two competing storage concerns: free water can freeze and damage the tank, while resin should not be allowed to dry out unnecessarily. The exact storage method depends on the tank design and manufacturer’s instructions. If the manual says to drain and dry the exterior, do so; that does not mean leaving the resin bed open in the sun to dehydrate.
Before the first trip of the new season, inspect the tank for cracks, check the hose washers, and perform a fresh regeneration if the resin has been stored for months.
Common regeneration mistakes
Adding salt without completing the cycle
Salt in the tank is not the same as a completed regeneration. The brine must contact the resin, and the displaced hardness minerals must be rinsed away.
Using the wrong amount of salt
Too little salt may produce incomplete regeneration. Too much creates unnecessary waste and a longer rinse. Measure the amount recommended for your tank.
Forgetting to rinse
Never send salty regeneration water into the RV plumbing. Continue rinsing until the outlet water is free of salty taste and passes a hardness check.
Letting the resin dry out
Do not store an open tank in direct sunlight or leave the resin exposed to hot, dry air. For winter storage, prevent freezing while following the manufacturer’s instructions for keeping or removing moisture.
Using salt with additives
Avoid scented, dyed, treated, or additive-containing salt. When in doubt, use plain table salt.
Running water too quickly
A full-pressure blast may not regenerate the resin evenly and can stress hoses and fittings. Use a controlled flow during the brine stage.
Over-tightening the cap or fittings
Hand-tighten fittings unless the instructions specify otherwise. Excessive force can damage threads, compress an O-ring unevenly, or make future removal difficult.
Skipping water tests
Soft-water feel is a useful clue, but a hardness test provides better confirmation. Test when arriving at a new campground and after regeneration.
Treating a softener like a filter
A softener does not replace a carbon or sediment filter. If your water has chlorine, odor, sediment, or other contaminants, use the appropriate filtration equipment alongside the softener.
Regeneration checklist
Use this checklist when recharging a portable RV water softener:
- Turn off the supply and relieve pressure.
- Disconnect the softener from the RV.
- Drain the tank safely.
- Inspect the cap, fittings, and O-ring.
- Add about 2 pounds of plain salt to an 8,000-grain unit.
- Add about 4 pounds of plain salt to a 16,000-grain unit.
- Add fresh water according to the unit instructions.
- Allow the brine to soak or flow through the resin as directed.
- Route wastewater to an approved sanitary drain.
- Rinse with fresh water.
- Test the outlet for hardness.
- Confirm that the water is not salty.
- Reconnect with a pressure regulator.
- Check for leaks.
- Store the unit upright and protected from freezing.
A portable RV water softener can provide many seasons of service when it is regenerated at the right time, rinsed completely, and protected from sediment, freezing, and unnecessary chemical exposure. Match the unit’s grain capacity to your travel style, use plain salt, test the water regularly, and let the manufacturer’s instructions take precedence whenever they differ from general guidance.
Frequently asked questions
Can I regenerate an 8,000-grain unit with regular table salt?
Usually, yes. Portable RV softeners commonly use plain table salt for regeneration. An 8,000-grain unit typically uses about 2 pounds, or approximately one standard box, per cycle. Confirm the amount and method in your unit’s instructions.
How much salt does a 16,000-grain softener use?
A 16,000-grain unit commonly uses about 4 pounds of salt, or approximately two standard boxes. The exact amount may vary by model, so measure the salt and follow the supplied instructions.
How do I know when rinsing is finished?
The water should no longer taste salty, and a hardness test at the outlet should show that the water is substantially softer than the untreated source water. Taste alone is not a substitute for testing.
Can I dump regeneration brine on the campground grass?
No. Concentrated salt brine can damage plants and soil. Ask the campground where brine may be discharged, and use an approved sanitary drain or dump station only when permitted.
Can I use potassium chloride instead of sodium chloride?
Only if the softener manufacturer approves it. Potassium chloride may work with some ion-exchange resin, but it costs more and still creates a salty wastewater stream that requires responsible disposal.
Should the softener go before or after a carbon filter?
A common RV arrangement is pressure regulator, sediment protection, softener, then carbon filtration. Follow the flow direction and installation instructions for your specific equipment, especially if the system is designed to reduce chlorine before the softener.

